1. Background
Once you have your own website/domain up and running, you might need to send Emails to someone else from you own domain, for promotion or notification purpose. There are many transitional mail services in the market, such as MailGun, SendGrid, Mandrill, and SES. For me, SES is the way to go as I am a long-time AWS user. I have been using many Amazon Web Services: EC2, RDS, S3, CloudFront, Route53, etc. Why not SES then? And, I have been recommending AWS to my company as well. Amazon should have written me a check for doing that. ^_^
AWS SES is a cost-effective solution (60,000+ emails for free every month) for sending emails from your own domain, if you are already an AWS user. According to the introduction here, there are three ways to use it: Amazon SES console, SMTP Interface, Amazon SES API. Since I was using GMail SMTP service (not under my domain but Google’s), SMTP is the way I would like to take.
2. Setup
Go to Amazon SES and click Email Addresses in the sidebar. Then click Verify a New Email Address and enter an email you want to use for messaging in the app.

Now go to your email provider and click the verification link. After verifying, go back to Amazon SES Email Addresses tab. You should now see your email verified.

Now, we are in a sandbox environment. A sandbox environment means you can only send and receive emails from verified addresses, and prevents you from spamming people. For a production-ready email service, we need to jump out of the sandbox.
3. Increase the Limit
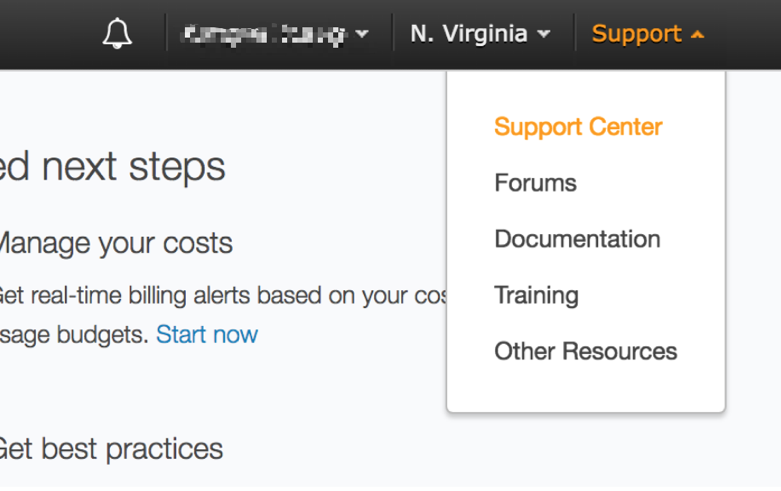
If you want be able to send emails to any email address, you need to make a written request to Amazon to graduate from the sandbox environment. To do this, navigate to the top-right hand corner at Support > Support Center.
At this next screen, click Create case. Then fill the form.
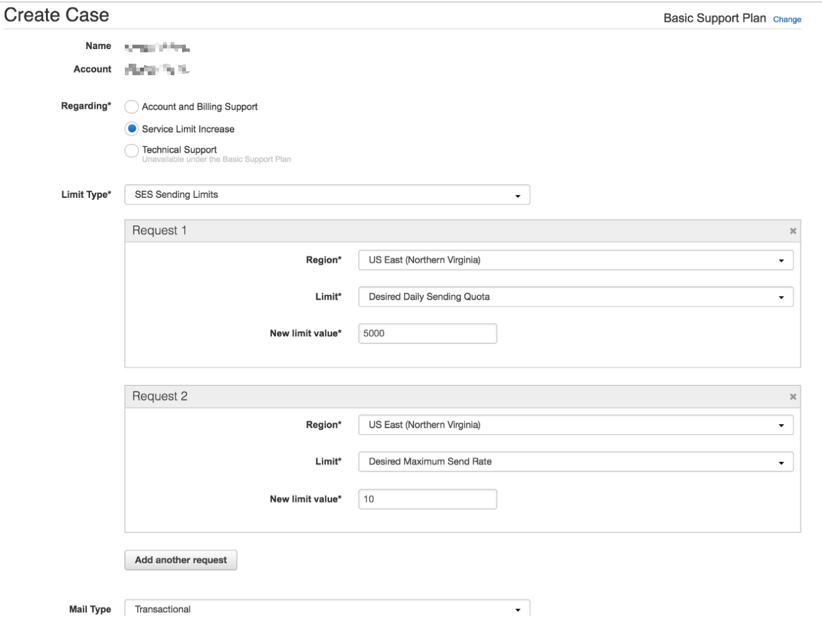
Select Service Limit Increase and set the Limit Type to SES Sending Limits. Now create 2 requests, one where Limit is Desired Daily Sending Quota (how many emails can be sent in one day), and the other where Limit is Desired Maximum Send Rate. Set the New limit value to the amount that you need. Finally, optionally set the Mail Type as it increases your chances of approval. Use transactional if your emails are generated as a request of a user’s activity. There are others available for other use cases.
The rest of the request is easy. Make sure you agree to comply with the Terms of Service, and you have a process to handle bounces and complaints (for when users mark your email as spam). Finally, give a brief explanation of your use case.
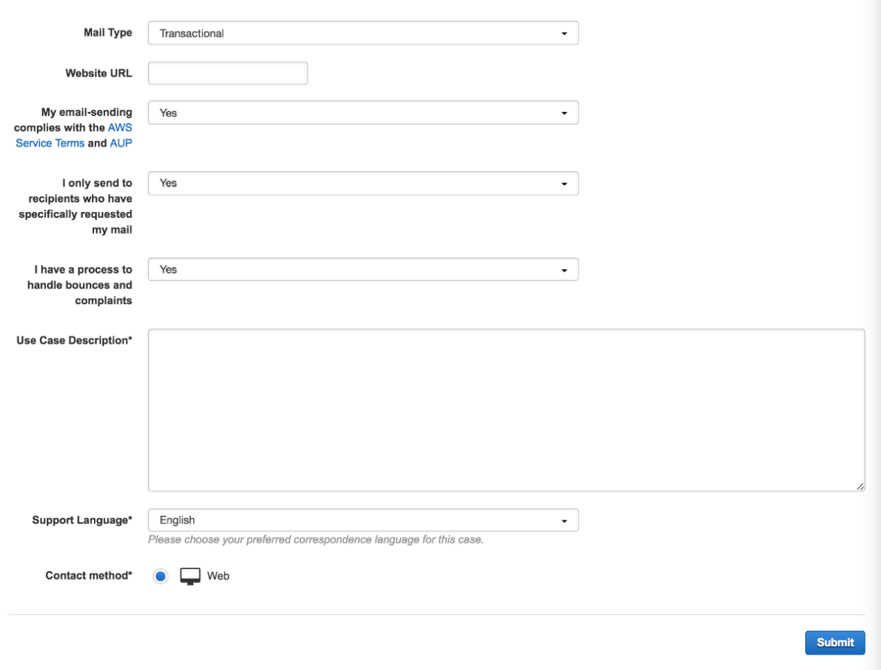
Submit your application and you should get an email from Amazon with the results of your service increase request. Once approved, your app can send messages to any email.
4. Config MAIL FROM DOMAIN
Add you own domain for SES.

Configure the domain settings for Verification, Notification, DKIM, Identity Policies, and MAIL FROM DOMAN. Each has its own linked tutorials, I will skip here. Please pay attention to MAIL FROM DOMAN settings. If you want send emails from no-reply@mail.yourdomain.com under you domain domain.com, set it as mail.yourdomain.com.
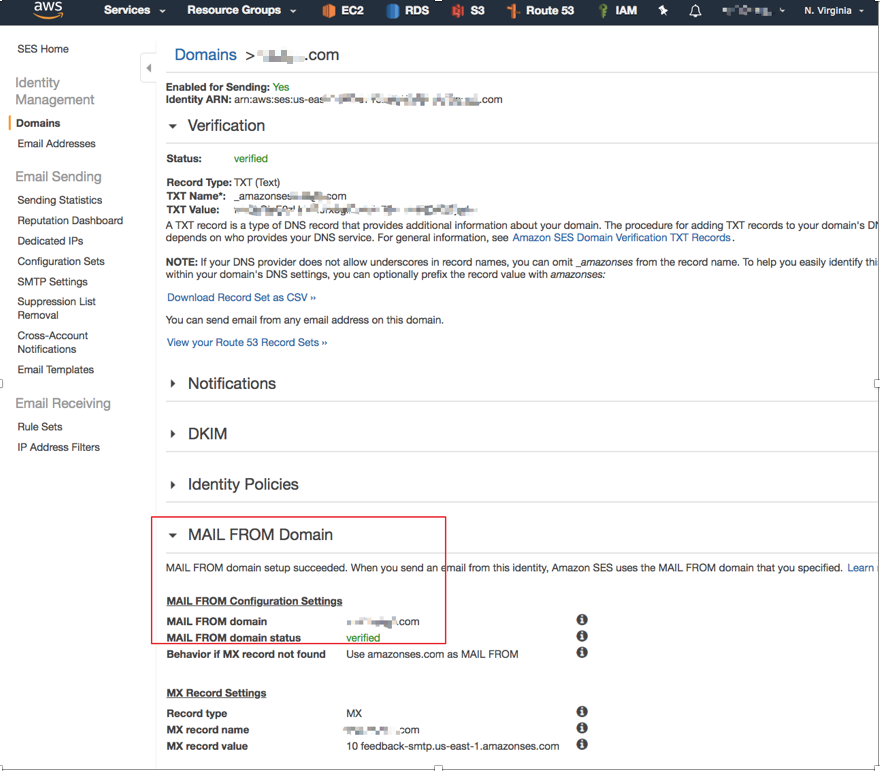
Once everything is verified. You can configure your Django app, and send an email ending with your own domain.
5. SMTP Credentials
Click on SMTP Settings at the left side bar at the SES service page. Click on Create My SMTP Credentials.
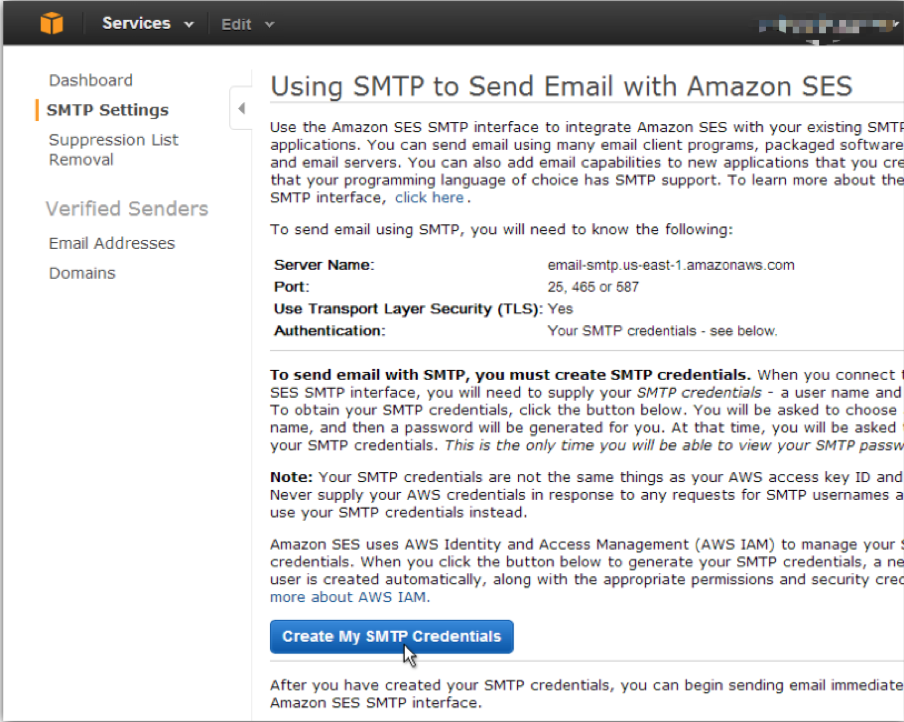
Enter your SMTP user name. This username will be used to identify you in the Amazon AWS panel only. And then click Create. A password and a user name for SMTP will be generated for you. Copy your credentials or click on Download Credentials as you won’t be able to view your SMTP password again.
After you created your SMTP credentials, you can configure your Django app to send emails through the Amazon SES SMTP interface.
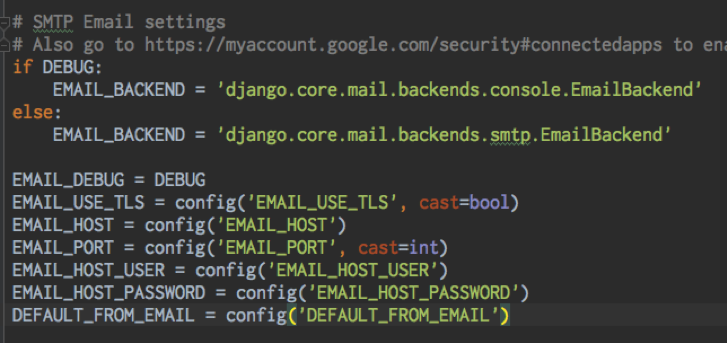
Make your DEFAULT_FROM_EMAIL='Your Name <no-reply@mail.yourdomain.com>'
NOTE: I am using
python-decouplepackage here, to prevent sensitive information form been leaking to others. Please refer to its official website on how to use it.
Now, all setting are done. You can now enjoy tens of thousands emails from your own domain for free, :-).
